Thursday, October 31

New American Cursive & Dysgraphia {Review}

One of our sons has dyspraxia –he has : dyslexia, dysgraphia, dyscalculia, and oral-motor weakness.  Every day is a challenge for him to complete even the simplest tasks...  

When we were given the opportunity to review The New American Cursive Penmanship Program, I was excited to give it a go – we had been told that it might be easier to teach him cursive than print…now was our chance to find out!

A little background
Most of us know what dyslexia is, but dysgraphia means difficulty with handwriting.  There are several different kinds of dysgraphia.  Some people with dysgraphia have handwriting that is often illegible and shows irregular and inconsistent letter formations.  Writing requires inordinate amounts of energy, stamina and time.

According to research, students with dyslexia have difficulty learning to read because their brains associate sounds and letter combinations inefficiently.  Cursive writing can help them with the decoding process because it integrates hand-eye coordination, fine motor skills, and other brain and memory functions.

Research also indicates that cursive writing has advantages for children with dysgraphia because it eliminates the necessity of picking up a pencil and deciding where to replace it after each letter.  Cursive writing can help them with the decoding process because it integrates hand-eye coordination, fine motor skills, and other brain and memory functions.  Cursive also has very few reversible letters
The program
We received Book 1, for beginners, and it has a teaching guide at the front that was followed by 68 instruction and exercise lessons.  There are illustrations and exercises for letter connections, and practice sheets for extra practice.  Every few lessons, there is a “Fun Exercises & Artwork” lesson that allows the child to take a break from daily work and have some fun reviewing previous material.  I like that the books are in black and white with a few drawings, but are not cluttered and detracting from the lessons.

The company also has a mascot, Mr. Meerkat, who teaches the way to draw each letter.  He’s cute, and brings a light-hearted element of fun to an otherwise boring subject.  In fact, my son was so enthralled by Mr. Meerkat that we had to go to the zoo and learn about meerkats!

The lessons are broken down into three steps :  the say the letter, feel the letter, and then write the letter.  “Feeling the letter” means writing them in the air or on the table with your finger.  Our therapist recommended that he write them in shaving cream, but that went over like a lead balloon…no ickiness for him!  They learn both the upper and lower case letters together, and after three or four letters, they have a page where they practice linking them all together.  We practiced our cursive daily, and continue to do so.
Our thoughts
My son was very excited to try out this program – he wanted to write cursive like big brother. However with limited teacher instruction on the formation of letter he has yet to find much success.  We are continuing to plug away at this program because he is making tiny baby steps of improvement, and as any parents of a special needs child knows, tiny steps are HUGE steps!  

It has been frustrating, but I cannot think that any other program would be much better.  It is just the nature of the beast.  If you have a child with dysgraphia, this is a program that helps with improvement, both in skills and confidence.  He may be frustrated, but I can see his confidence slowly growing as he makes those loops…..they don’t resemble letters at the moment, but I promise to come back one day with a sample of his writing and proudly show it off!
Positive Points
  • Simplified font is designed for beginners
  • Only takes 15-20 minutes each day to practice cursive
  • Slant is good for left-handers (not just right-handers) and very simplified
  • Black and white pages aren’t cluttered with graphics – easy to focus
  • Fun Exercises & Artwork pages provide a break from the daily drudgery (every couple of days) and much-needed extra practice
Negative Points
  • Very little instruction for teachers (there is a teaching guide, but it is sparse) – needs more background on formation of letters
  • Letters taught in alphabetical order – grouping them by stroke style might be a bit easier for learners
Crew Disclaimer

Tuesday, October 29

Oklahoma History - Northeastern

Tucked into an area that was plagued with murder, money, and mystery*, Woolaroc is a throw back to another era of Oklahoma history...

Woolaroc!  The name is a conglomeration of woods, lakes, and rocks.  At the entrance, they give you a map showing general areas for the various wildlife, and a nice CD to narrate your drive along the five-mile trail.
We saw deer, longhorns, ostriches, emus, and bison wandering freely and undisturbed.  The ranch is designed to make you feel as though you've stepped back in time at least a hundred years, and it does a good job of conveying that spirit.  Along the route, we came to the Mountain Men camp, one of the living history exhibits.
The boys learned about fur trappers and traders, the Mountain Men of the early 1800's, and how they co-existed peacefully with the Native American tribes.  They also learned to throw tomahawks, make a pouch from a turtle shell, and stretch beaver skin.  It was hard to top the Mountain Man exhibit, which was by far their favorite stop on the trail!  We stopped by the petting barn, playground, and bison exhibits.
The mission of the Woolaroc Museum, built by Frank Phillips, founder of Phillip 66, was to preserve the western spirit of Oklahoma for future generations.  Half of the museum focuses on Native American heritage (this part was closed for renovations during our visit), while the other half focuses on the oil industry.

One piece of the museum that we found fascinating was the 1927 Dole Air Race.  Of the eighteen planes entered to fly from northern California to Hawaii, only two landed safely.  Phillips entered the race as a publicity stunt, to get his new oil products into the spotlight; and he won the race in 26 hours, 17 minutes, earning him the $25,000 first prize. 
At his "getaway lodge," which could double for a good-sized hotel, you will see numerous trophies on the walls.  It's difficult to see, but the elephant head on the wall came from the Ringling Brothers circus.  During a poker game one night, he won the entire circus, but later allowed the circus owner to win it back.  When the elephant died, Mr. Ringling had it stuffed and sent to Mr. Phillips as a token of the 'time he owned the circus.'
Not surprising, the thing that the boys remembered the most was the Mountain Men exhibit.  When we got home, they immediately went to make their own costumes and set out on a trip.  They brought their pack, pup tent, (toy) guns, and other necessary items for being successful trappers!  Hubby and I taught them the Ballad of Davy Crockett to sing while they hiked...


Oklahoma Hills Resources

Sounder & Sharecropping (Novel Study)

After the Civil War ended, the "forty acres and a mule" policy gave newly-freed African-Americans the opportunity to work their own land.  However, President Andrew Johnson ordered that land to be returned to its previous owners as one of the first Reconstruction acts.  This left the freedman in the position having to work another man's land....

Sharecropping is a type of farming in which families rent small plots of land from a landowner in return for a portion of their crop, to be given to the landowner at the end of each year.  In the rural South, it was typically, but not always, practiced by former slaves.  Whether the sharecropping family was black or white, it was still a form of legalized slavery.

In 1865, the Freedman's Bureau, which was created to help former slaves, had to tell them that they could either sign a contract to be a sharecropper or be forced to leave the land.  While it did allow for freedom and autonomy, sharecropping often left families owing more money to the landowner than they were able to repay.

Some families were able to get the money to move up the ladder from sharecropping to owning land, but many were not and were left to perpetuate the cycle.  Though difficult to obtain for many, education was often seen as a way to break the cycle.

Our spine read for this unit is Sounder

Access the complete unit in the American History Novel Studies Bundle!


Includes sixteen unit studies covering American History. Each unit addresses a new topic, spanning the Revolutionary War to Vietnam.  Each unit has introductory text, which will give the student basic background information about the topic at hand.

  • There are photographs and illustrations, and we have also included primary documents when available.
  • After this text, there are featured videos, which augment the background information and help make the topic more accessible for more visual students.
  • You will also find a short list of reading books, including a featured novel that the unit builds upon.
  • There are vocabulary words, places, and people to identify.
  • Reading comprehension, critical thinking questions, and writing assignments are included.
  • We add fun with hands-on activities and extra videos to watch that will bring the era to life.
  • Some units also have cooking projects.

These studies are directed toward upper grades students, but some have resources for younger students so that the whole family can work together. Our family has used unit studies as curriculum for many years, and we hope that your family will enjoy these, too!

Product sample:  Paper Son & Angel Island Immigration  & Within These Lines & Japanese Internment

Includes:
  • Casualties of War & Vietnam War
  • No Promises in the Wind & the Great Depression
  • Out of the Dust & the Dust Bowl
  • The Watsons Go to Birmingham & Civil Rights
  • Dusty Sourdough & Alaska
  • The King of Mulberry Street & Ellis Island Immigration
  • Paper Son & Angel Island Immigration
  • The Red Menace & McCarthyism
  • Johnny Tremain & Faces of the American Revolution
  • Sounder & Sharecropping
  • World War II Code Talkers
  • Flashback Four: Hamilton-Burr Duel
  • Within These Lines & Japanese Internment Camps
  • Flashback Four: Titanic Mission
  • Flashback Four: Lincoln Project
  • The Diviners / The Great Gatsby & Roaring Twenties

Monday, October 28

Easy Homemade Beeswax Food Wrap

One way to cut down on waste and be a frugal mom is to make your own beeswax food wrap.  It can be used as a replacement for foil, plastic wrap, or sandwich bags...  

A few things you'll want to know...
  • Just get it a little bit warm (hold it in your hands) and then shape it over what you are covering.  When it cools, it will hold that shape to create a seal.
  • Don't put it in the microwave or dishwasher.  This will melt the wax, damaging your wrap and the items near it.
  • Wash it by hand with soapy water.
  • Don't use this to store raw meat.

Grab your list of ingredients (below) and prep your cloth.  Cut it into the size(s) that you want, using pinking shears to keep the edges from fraying.

You'll need:
  • pinking shears 
  • cloth (cotton remnants work well)
  • paintbrush (throwaway or craft brush)
  • tin foil
  • wax paper
  • rolling pin
  • cookie sheet with lip
  • wax pastilles   
  • Cover the pan and lip with tin foil -- this will make clean up MUCH easier, plus it'll save your pans!
  • Lay out your material and sprinkle beeswax on it.  
  • In this photo, we're using the pastilles.  We also used some of the beeswax chunks from our own hives.  It will melt faster if you use smaller pieces, like these pastilles.
  • Place in the oven - preheated to 250 - for about five minutes.  Be sure to peek in every so often.  When they begin to look like the cloth on the left, give it two more minutes.  Pull the pan from the oven, and use the paintbrush to smooth out any bigger pieces of wax still left.
  • If you accidentally forget, and leave it in the oven for ten or fifteen minutes, it will completely melt the pastilles but may not smooth them out evenly. 
  • Pull them off the tin foil and place in single layers on wax paper.  Use a rolling pin to flatten completely.  Allow to cool overnight.
It makes perfect sense, but it took my son to come up with this additional step to our process.  Just like you'd use something oil-based (like cooking spray) to keep your baked goods from sticking to the pan, we're using water spray to keep the oil-based beeswax from sticking!  This definitely made things move a little faster...  He came up with another great tip, too, that you can see at the end of the video!

In the video, you see the piece we've been using for the past five or six years.  Since we had just a little bit more beeswax than we needed, we went ahead and gave this one a second coat...so it should be good for another six years!

Not sure about making your own yet?  Try out pre-made Bees Wrap!


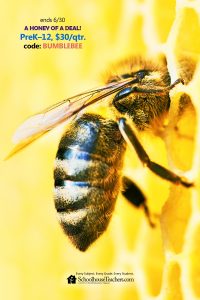
Keep the fun rolling throughout the summer with SchoolhouseTeachers! There is no need to slow down your children’s education. Simply switch gears, giving them something to be excited about! Educate and entertain your kids at the same time by selecting their favorite electives during the summer months.

Starting JUNE 3RD, 2021 Use code: BUMBLEBEE during the SchoolhouseTeachers Bumblebee sale to pay only $30 (reg. $49.97) for an Ultimate Quarterly Membership, and the entire family will immediately receive access to all that SchoolhouseTeachers has to offer.


Your Favorite Store-Brand Recipes....Made at Home!!


Lunch & Dinner Helpers
King's Hawaiian Bread....our kids' favorite kind of bread!
  • 6 cups flour
  • 3 eggs
  • 2 cups pineapple juice
  • 3/4 cup sugar
  • 1/2 teas. ginger
  • 1 teas. vanilla
  • 2 pkg. yeast
  • 1 stick margarine
  1. Beat eggs; add pineapple juice, sugar, ginger, vanilla and melted margarine. 
  2. Put 3 cups flour in a large mixing bowl. Add egg mixture and stir until well mixed. Sprinkle in yeast, 1 package at a time, mixing well. 
  3. Gradually add other 3 cups flour. Batter will be hard to mix with spoon. You may have to use your hand. Make sure it's mixed well. Leave batter in bowl and cover with cloth and place in warm place.
  4. Let rise 1 hour. Remove from bowl and knead in 1/2 cup flour.
  5. Knead about 10 times. Divide into 3 equal parts and place in well greased round cake pans. Cover and place in warm place and let rise about 1 hour. 
  6. Bake at 350 degrees 25 to 30 minutes.
Papa John's Garlic Sauce....no more fighting over the little tub of sauce!
  • 1/4 − 1/2 stick margarine
  • 1/2 Tablespoon garlic powder
  • 1/4 teaspoon salt
  1. Melt butter in the microwave (about 30 seconds).
  2. Put in salt and garlic powder (to taste).
  3. Microwave for 5 seconds longer.
Hooter's Buffalo Chicken Wings....because everyone goes for the wings, right?
  • 1/4 cup butter
  • 1/4 cup hot sauce
  • dash ground pepper
  • dash garlic powder
  • 1/2 cup all−purpose flour
  • 1/4 teas. paprika
  • 1/4 teas. cayenne pepper
  • 1/4 teas. salt
  • 10 chicken wing pieces
  • vegetable oil for frying
  1. Heat oil in a deep fryer to 375. You want just enough oil to cover the wings entirely; an inch or so deep at least.
  2. Combine the butter, hot sauce, ground pepper, and garlic powder in a small saucepan over low heat. Heat until the butter is melted and the ingredients are well−blended.
  3. Combine the flour, paprika, cayenne powder, and salt in a small bowl.
  4. If the wings are frozen, be sure to defrost and dry them. Put the wings in a large bowl and sprinkle the flour mixture over them, coating each wing evenly. Put the wings in the refrigerator 60−90 minutes. This will help the breading to stick to the wings when fried.
  5. Put all the wings in the hot oil and fry 10 to 15 minutes or until some parts of the wings begin to turn dark brown. Remove from the oil to a paper towel to drain. Don't let them sit too long, because you want to serve them hot. Quickly put the wings in a large bowl. Add the hot sauce and stir, coating all of the wings evenly.
  6. Serve with bleu cheese dressing and celery sticks on the side.


For the Sweet Tooth
Magic Shell Ice Cream Topping....dresses up your ice cream!
  • 6 ounce package chocolate chips
  • 1/2 stick butter or margarine
  • 1/4 cup vegetable oil
  1. Melt chocolate chips and butter in a double boiler.
  2. Add oil and mix in well. When dipped into, or spooned over ice cream it will create a hard chocolate shell.
Nutter Butter Cookies....the most-sought-after treat in our family's cupboard.
Cookies:
  • 1/2 cup vegetable shortening
  • 2/3 cup granulated sugar
  • 1 egg
  • 1/2 teaspoon salt
  • 3 tablespoons peanut butter
  • 1/2 cup old−fashioned Quaker oats
  • 1 cup all−purpose flour
Filling:
  • 1/2 cup peanut butter
  • 3/4 cup powdered sugar
  • 1 tablespoon fine graham cracker crumbs
  1. Preheat the oven to 325 degrees F. 
  2. In a large bowl, cream together the shortening and sugar with an electric mixer. 
  3. Add the egg, salt, and peanut butter and beat until well blended.
  4. Put the oats in a blender and blend on medium speed until they are almost as finely ground as flour.
  5. Add the oats and flour to the mixture and blend well.
  6. Pinch out small portions of dough and roll into 1−inch balls in the palm of your hand. Press these flat on ungreased cookie sheets so that they form 2−inch circles. If you're a stickler for a cookie that looks just like the original, you can form the dough into flat peanut shapes.
  7. Bake for 8 to 10 minutes, or until light brown around the edges. 
  8. While the cookies bake, combine the filling ingredients in a small bowl. 
  9. When the cookies are cool, use a butter knife to spread a thin layer of filling on the flat side of a cookie and press another on top. Repeat. Makes 2 dozen cookies.
Swiss Miss Hot Chocolate....a wintertime staple!
  • 16 oz. box of non fat dry milk
  • 1 Cup Sugar
  • 3/4 Cup cocoa
  1. Sift all ingredients together three times. Store this mixture in a tightly sealed container in a cool place. 
  2. When ready to use, you can add a couple of heaping tablespoons to hot water.
  3. Sprinkle miniature marshmallows on top.

Friday, October 25

Teaching Work Ethic


How many times have you thought to yourself "WHY do I have to do everything around here???" 

News flash : You don't. While we didn't create these little people to make them work, we can teach a lot of character and ethic through chores and working around the home, and it's just as crucial to their schooling.

Mom, you are the CEO of the home, and need to plan for your employees. Just like you wouldn't start a new job without knowing the work expectations, they can't work without knowing what is expected of them.

Let younger children work beside you. Yes, it's going to cause more hassle and a mess in the short term, but the pay out will be worth it! They will learn how you do something, and (if you'll answer a plethora of questions) why you do it that way. One of the best tools in my parent arsenal is explaining everything to my children. Why we something is just as important as how.

Walk your children through each chore three to four times, BE SPECIFIC about what you want done, and then turn them loose. We have a chore card for each room of the house, and the kids have been walked through each set of chores multiple times. If they need help with something (we're out of wet wipes; the vacuum is broken; etc), they know that they can ask for help. They may not ask for help just because they don't feel like doing it.

Setting Up a Chore System
Laminate the chore cards - they'll last longer. We keep these laminated cards in a pocket chart alongside our laminated school day cards, and chores are a natural extension of the school day in our homeschool.

Don't expect them to do it well at first, but expect to see some effort. Also, be sure to check behind your child and offer up a smile and positive words when they've done a good job. If the job needs work, provide constructive criticism, but remember that they did the best they could do and may just need more practice. (If you can tell they didn't try at all, this is a character issue...address accordingly.)

Give your children both paid and non-paid chores. This gives them a chance to work and save up for something they have been wanting. In our house, non-paid chores are everyday ones : feed the animals, clean your room, help clean the kitchen, fold laundry, etc. Paid chores are provided on an as-needed basis (ie, when I needed help collating 2,000 packets for a meeting). Occasionally, if they've been working very hard to earn something, typically a Lego set, and are very close to it, we will 'invent' a chore that needs doing, such as picking up sticks in the yard. They are doing the work, and feel proud of the accomplishment of purchasing their own Lego set.

When you teach your children to do chores, you're empowering them. They're learning life skills, and they're also learning about work ethics. They can do something. They are useful. They are needed. Even our special needs child knows that he has value and things that he is very good at - he has confidence! No matter what the future brings, they will know how to work hard at anything they put their mind toward. In our opinion, this is just as important, if not more so, than the academics of school.

Pick up the Spring Cleaning Checklists for FREE on our Subscriber Freebies page!  Not yet a subscriber?  Sign up here!


Snag a slew of resources in the Homeschool Helpers Bundle!


Covers ten topics to get your homeschool running smoothly!
 
Getting Started
· A Parent’s Alphabet
· Choosing the Right Curriculum for Your Family
· Motivating Your Teens
· Seven Steps to Teaching Work Ethic
 
Special Needs
· Occupational Therapy in Homeschool
· Speech Therapy in Homeschool
· Teaching the Distracted Child
 
Making it Fun
· Game-Schooling – Learning through Play
· How to Snag Free E-Books
· Holiday Foreign Language Fun

Looking for more?  Check out the original Mom’s Bundle and Homemaking & Homesteading Bundle!