My grandma used to call pads "necessities," and I rather like the term, so I'm sticking with it! This isn't exactly an upcycling project, but it takes low-cost materials to make something that can be reused several times. If you've never tried them before, I recommend giving it a shot, because these quick-dry, cloth menstrual pads provide more comfort than you can imagine!
You'll need :
- Flannel cloth
- Pattern (see below)
- Thread & Scissors
- Sewing machine
- Snap fastener
- Snaps

If you're interested in trying cloth menstrual pads, but not sure you're ready to jump in and make your own yet, you can purchase a starter set at our Cottage Shoppe.
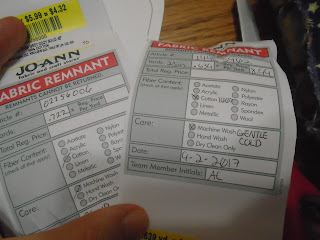
I get my cloth from the remnant rack at our local fabric store. This way, it's already deeply discounted, and I can usually stack a coupon to get even more taken off. The cloth is good quality flannel, which will absorb quite a bit when it's layered. Because I choose remnant cloth, there are all sorts of crazy patterns!
To create your pattern, take a piece of newspaper and draw a 7 1/2" by 7 1/2" square on it. Round the corners. Congratulations! You've just created your first homemade pattern, like your great-grandmother used! If you'll cut out the squares all in a row, touching, you'll be able to maximize your cloth and get as many pads out of a piece as possible.
Both the outer layer and absorbent portion of the pad are made from the same pattern, so I typically cut all of my pieces out at once, and then begin sewing them together (wrong sides to wrong sides, or inside out) in pairs. Be sure to leave a 1" opening on the fourth side so that you can turn your cloth. If you have a serger sewing machine, you can sew them together the right way, with your serger setting. However, I don't own one, so simply use a 1/8" seam and then turn them back right-side-out. After turning, use a tiny seam to close the hole.
Now it's time to assemble the pads. Take two of your sewn squares. Lay one flat as a square; turn the other 45 degrees, like a diamond, and center on top of the square. Sew a vertical seam to connect the two, approximately 1 3/4" from the center. Sew another vertical seam the same distance on the other side, so that you have two vertical seams connecting the two cloths.
The diagonal piece is your absorbent piece. Once you've tri-folded it, along the seams, you'll have six layers of flannel cloth, which are lightweight and breathable, but will still absorb quite a bit! *If you find that you need something a bit heavier for certain days, try making this exact same pattern, but with a lightweight fleece in the absorbent layer.*
To finish your pads, apply snaps to the outer layer, or wings. I use a snap fastener, and whichever snaps happen to be on sale at the moment. For the one in the picture, I'm using plastic hearts and stars. They snap and hold just as well as little circles, plus they add some whimsy!
For about thirty dollars, you can make a nice stash of pads that will last you for years. It takes a bit of investment, but you'll save a lot, and do your bit for the environment, as the years roll by.
A few extra notes....
 To make longer pads, alter your pattern by adding one inch to each side, all the way around the square. Unless you are making pads for a young girl, I would not recommend making them any shorter.
- To make pads for heavier days, you can replace the flannel in the absorbent layer with fleece. While this is going to be a bit hotter, it's still more breathable and comfortable than the bulky store-bought pads for heavy flow.
- If you're interested in trying cloth menstrual pads, but not sure you're ready to make your own yet, you can purchase a starter set at our Cottage Shoppe.
- There are two options here for cleaning your pads. You can wait until you get enough to do a load by themselves (fine, if you have a large stash) or wash them individually by hand. Personally, I do an individual pre-wash and then wait until they go in the laundry for a second round. What I like about this pattern is that the absorbent layer folds up and allows it to dry much faster than traditional cloth menstrual pads. Also, because they fold open, it's much easier to make sure that all of the layers are clean. I'm all about reusing things, but I want to know that they're clean, too!


No comments:
Post a Comment
Note: Only a member of this blog may post a comment.