Click the graphic above to access all our novel studies!!

Wednesday, June 26

How to Snag FREE Kindle Books!

In one Facebook group, I'm known as 'the lady who shares the free Happy Hollisters books.'  With over 30 books in this vintage series, and it being one that we're all trying to collect, it's nice to be able to pick them up for free!

Folks are always asking how I find them for free...so this tutorial is to help anyone looking to load their e-reader library on the cheap.  These are my favorite seven ways to score free Kindle books.  It's important to note that the free books change daily.  If you're after something specific, it would be beneficial to check every few days.  Happy treasure hunting!
parent book library
Homeschooling families in particular may be interested in another set of e-books, from SchoolhouseTeachers, that are free in their e-library!

First, let's talk about Amazon Prime.  We all know the benefits...you get free shipping, special discounts, access to streaming music and videos, plus a lot of extras that I probably don't even know.  But did you know about all of the free book extras that are included?
With Kindle First, Prime members get one free newly-released book per month.  You can choose one of six book selections (though occasionally the company will surprise members will the ability to choose all six!).  Check out this month's selections of Kindle First books.  Not a Prime member?  Learn more here.
Prime Reading is another perk for members that gives access to books and magazines that are free to read.  Unlike 'purchasing' books for free, you do not get to keep these books.  The inventory rotates, so keep an eye on your wishlist!  Check out all of the Prime Reading Books.
If your inner-bibliophile just can't be satisfied with these options, Prime members also have access to Kindle Unlimited.  The 'free' books here actually cost 9.99 / month to access, BUT there are a ton of great best-sellers and new releases included!  Not sure if this is you?  Try it for a month at no cost.  Check out the Kindle Unlimited books here.   Try out a 30-Day free trial of Kindle Unlimited here.
Not interested in Amazon Prime?   Try your local library.  Most libraries use the Overdrive app, which allows you to check out e-books through Amazon at no cost.  You'll need a library card and online access to your library's card catalog.  At checkout, just sign in to your Amazon account and choose the device where you want your book sent.  The Overdrive app is available on most platforms.
Kindle Advanced Search is a great tool for searching by author, title, or keyword.  It also allows you to refine search results by reader age.  Choose 'sort results by' and click 'price: low to high.'  This will put all of the free books in your tailored results at the top of the list.  Check out Kindle Advanced Search.
The Master List of Free Kindle Books is sorted by bestselling titles.  Go to the master list to see all free e-books available at the moment.  On the left-hand side of the page is a list of all the book genres.  You can click on a category to see the free books in that genre.  Some can be narrowed into sub-categories as well.

The simplest method is a simple search by genre.  The links below will take you to all the free books available today in the specific genre.
Prime Book Box is a paid subscription service that will send your child new books to read, based on age, gender, and reading preferences.  Parents save 40% off Amazon list prices when using Prime Book Box.  The first month is discounted to give you a chance to check it out for yourself!

We hope this helps you to save big on books!

Snag a slew of resources in the Homeschool Helpers Bundle!


Covers ten topics to get your homeschool running smoothly!
 
Getting Started
· A Parent’s Alphabet
· Choosing the Right Curriculum for Your Family
· Motivating Your Teens
· Seven Steps to Teaching Work Ethic
 
Special Needs
· Occupational Therapy in Homeschool
· Speech Therapy in Homeschool
· Teaching the Distracted Child
 
Making it Fun
· Game-Schooling – Learning through Play
· How to Snag Free E-Books
· Holiday Foreign Language Fun

Looking for more?  Check out the original Mom’s Bundle and Homemaking & Homesteading Bundle!

Tuesday, June 25

Pickling - So Easy, the Kids Do It!


Pickles are one my favorite, and one of the easiest, things to preserve from the garden.  If you're wanting to get started with canning, but a little intimidated by pressure canners and acidity concerns, then pickles are a fantastic first step for you!
You can use this recipe as a template for pickling other vegetables. Okra, green beans, garlic, and even carrots all make delicious pickles if you're feeling like branching out into other parts of the garden!
No matter what cucumber or vegetable you use, make sure they are ripe and feel firm — avoid limp or wrinkly vegetables. Wash the vegetables before pickling and cut away any bruises or blemishes.
These pickles can be processed in a hot water bath for 10 minutes, which makes them shelf stable for around a year. The downside is that the hot water processing will cook the cucumbers a bit and can sometimes give the pickles a softer texture. If super-crunchy pickles are your aim, skip the processing step and just keep the jars in the fridge — they'll keep refrigerated for several weeks.

How to Make Dill Pickles

Makes 4 pint jars  (though we usually go big and make several quarts at once!)

What You Need

Ingredients
  • 3 pounds cucumbers
  • 2 cups vinegar
  • 2 cups water
  • pickling spices  (by and large, a mix is the easiest way to start)
Equipment
Instructions

  1. Prepare the jars: If you are planning to can your pickles for long-term storage, bring a large pot of water to a boil and sterilize the jars and their lids. If you are planning to make refrigerator pickles, simply washing the jars and lids is fine.
  2. Prepare the cucumbers: Wash and dry the cucumbers. Trim away the blossom end of the cucumber, which contains enzymes that can lead to limp pickles. Leave the pickles whole, cut them into spears, or slice them into coins, as preferred.
  3. Pack the pickles into the jars: Pack the pickles into the jars. Trim the ends if they stand more than 1/2 inch below the top of the jar. Pack them in as tightly as you can without smashing the cucumbers.
  4. Bring the pickling brine to a boil: Combine the vinegar, water, pickling spices in a sauce pan over high heat. Bring to a rolling boil. Pour the brine over the pickles, filling each jar to within 1/2-inch of the top. You might not use all the brine.
  5. Remove air bubbles: Gently tap the jars against the counter a few times to remove all the air bubbles. Top off with more pickling brine if necessary.
  6. Tighten the lids: Place the lids over the jars and screw on the rings until tight.
  7. Optional — Process the pickles for longer storage: For longer storage, place the jars in a boiling pot of water. When the water comes back to a boil, set the timer for 10 minutes and remove the jars immediately. Make sure the lids pop down; if they do not, refrigerate those pickles and eat them first.
  8. Cool and refrigerate: Let the jars cool to room temperature. If you processed the jars, they can be stored on the shelf. If unprocessed, store the pickles in the fridge. The pickles will improve with flavor as they age — try to wait at least 48 hours before cracking them open.
  9. Storing canned pickles: Canned pickles will keep for at least a year on the shelf and for several weeks in the refrigerator once opened; refrigerator pickles will keep for several weeks.


Pick up the Homemaking & Homesteading Bundle in our Cottage Shoppe!  

The bundle includes twenty-four tutorials with background information for anyone who is interested in homemaking and homesteading. Topics are broken down into:
  • In the Kitchen – Fall & Winter
  • In the Kitchen – Spring & Summer
  • Around the Homestead – Inside
  • Around the Homestead – Outside
For more great homesteading fun, check out the Homesteading Course at SchoolhouseTeachers!

This homeschool homesteading course is designed for anyone who has a desire to live more independently and prepare much of what is needed each day using their own hands. In this elective course, the student can learn how to work for what they want by making it themselves, instead of participating in an “on demand” society. Homeschool students of all ages learn patience, along with the skills needed to make their own cleaners for the home, sunscreen, homemade ketchup and dry mixes, as well as how to choose animals and prepare for emergencies, and much more. Learning the patience and usefulness of “doing it yourself” can be immensely helpful not only in the sense of living a healthier life, but also for the budget!

Monday, June 17

Upcycled Garage Sale Finds

One of my favorite summertime activities is picking up 'junk' from garage sales and giving it an overhaul.  

These are some of the upcycling projects from last summer's finds....everything we started with cost less than a dollar - or was even free!

Paid Finds

We started with this Hawaiian-themed desk.  We picked it up - in really beat up condition, but with a good base - for a dollar at a garage sale, and completely overhauled it.  My eldest used some old curtain material for the seat and painted it.  I put in the tile and the chalkboard.   Voila!

We snagged this dingy, nasty chair at an estate sale for a quarter.  It had good bones, and was quality vintage, but needed a face lift.  The boys cleaned it and painted it, and I made new a new seat and back for it.  Doesn't it look like so much more fun now?!  My sister (with her inexplicable love of the color yellow) was the inspiration for this one.....the little bumblebee!

Free Finds
This old captain's chair was out in our shed.  I have no idea where it came from or why it was there.  There were six of them...we gave all six of them different "classic" looks, and sold all except this one.  The desk was also out there, and we cleaned it up, painted it, and used an old pillowcase to make a matching seat cushion.  We resold them for a little 'piggy-bank profit.'

These were during our "ocean phase," when we were visiting the aquarium. We had lots of temporary tattoos, and discovered that they attach quite nicely to old, leather suitcases!  They brightened this blue one up and turned it into a cute, kid-sized piece.  The old window sash was scraped, sanded, and stained before we stuck a poster-sized photo, which hubby had taken in Cozumel, behind it.

The end table was painted with a Dr. Seuss themed / outer space world during my eldest son's space craze.  The youngest was still into pirates, so I created a play table just for him out of some scrap wood we had laying about the garage.  Neither of the tables were painted by the boys, but they each dreamed up the designs for them.

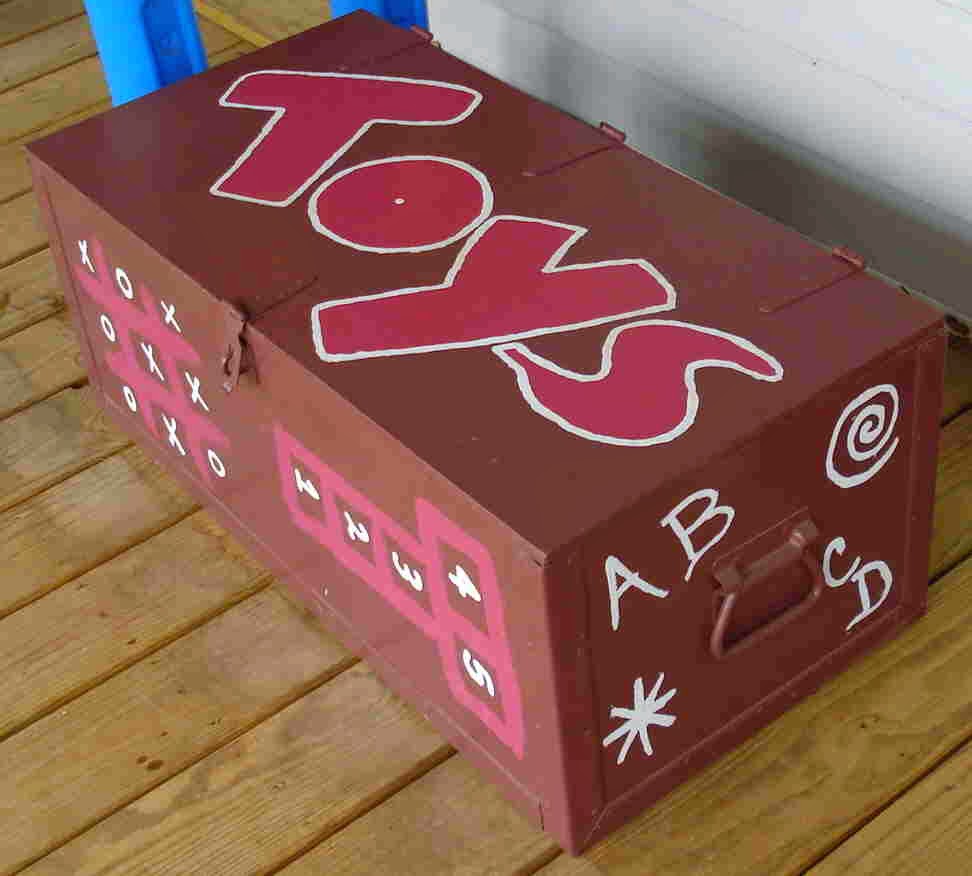
A friend of mine had this old army footlocker that she wanted to use for her girls' toys...so I had her bring it over and got right to work.  This one only took an afternoon - all the kids were playing together nicely, so I was able to finish very quickly once the initial coat of purple dried.  Simple, yet effective, her girls still love it today!

 I hope that these projects have inspired you to go out and create something new with your kids - or just for yourself!  Don't be limited by what the mass-producers create....use your imagination, put your spin on it, and make it memorable!

Thursday, June 13

Home Preservation Basics : Canning, Freezing, & Drying Foods


"Home canning puts the pleasure of eating natural, delicious produce at your fingertips year-round."


On a good year, summertime brings a bounty from the garden, as well as a lot of hot mornings spent canning....but there's something soothing about hearing the tiny pop-pop-pops of lids sealing, and seeing the beautifully-colored jars lining shelves.


We grew it, we canned it, and come wintertime, we will enjoy the fruits (or vegetables) of our labor!


A Quick Word on Preservation Techniques...
Not everything is conducive to canning.  Some foods do better when they are frozen or dehydrated.  We'll talk about all three techniques.

Dehydrating
  • Advantages: Dried fruits take up considerably less space and are ideal for hiking / camping since they are a fraction of the weight. Dried vegetables can also be added to soups and casseroles in the wintertime when fresh produce is not in peak season. 
  • Disadvantages: Nutritionally speaking vitamins A and C will be destroyed by the heat and air during this processing. Water is necessary for making most items usable in future recipes. 
Freezing 
  • Advantages: Freezing is one of the top preservation methods to protect nutritional value. Using frozen produce can be huge time saver in a crunch. Just add frozen veggies to a casserole or stir-fry for a quick dinner, or use defrost frozen fruit for a quick dessert. Nutritious and quick! 
  • Disadvantages: Freezing expands the food's natural water, and can result is ruptured cell walls and a softer texture when thawed. Additionally, there is some research that thawing will also degrade vitamin C, so go ahead a cook your veggies frozen or toss some frozen fruit into a smoothie for a healthy treat. 
Canning 
  • Advantages: Fruits and vegetables can make tasty gifts, provide year round decoration and may be the main ingredient in your pizza or pasta sauce. Almost all fruits and vegetables can be canned, but for low-acid vegetables, pressure canning is the safest method to reduce the risk of botulism, a type of food poisoning associated with canned foods. 
  • Disadvantages: The process of pressure canning usually involves first heating the food product to destroy bacteria and then placing food in a sterilized container. The contents are then sealed by using high heat to generate pressure that causes steam to push the remaining air out of the cans. Unfortunately, these are steps that cannot be skipped and both heating and boiling result in loss of water-soluble nutrients. Commercial canning usually involves even more processing and can lead to further nutrient loss.
A Food Preservation Week

To get started, take your children to gather, or buy, the food you want to preserve. You want to preserve the freshest fruits and vegetables, and that means using what is in season and, when possible, using local produce. A good u-pick farm or farmer's market should offer the local and fresh produce you want.

Prep your produce.  Snap the beans, pit the cherries, slice the fruits & veggies... The children can do some of these things, but follow behind them (eg, be sure all the cherries got pitted). Make sure that they have clear instructions, and always budget extra time!  We usually do these tasks the afternoon / evening before our big canning day.


Freezing

I try to do the easy stuff first -- freezing is super easy. The fruit is cut into small slices and frozen on a pan, then transferred into a large freezer bag. This helps prevent the fruit from sticking together and turning into one large lump. 

The vegetables take a bit longer, since they need to be blanched (dropped in boiling water for a couple of minutes) first and then frozen the same way. The kids can help with freezing and drying, but I only let them watch the canning process.  

Canning is something that intimidates a lot of newcomers....you've probably heard a story or two of someone who was horribly burned or had a fire because of a canning accident, but the new canners have safety features built in that our grandmothers and great-grandmothers didn't have. There's never been a better time to start canning!

Today, we'll focus on pickles and jam. We do the pickles first (don't cook them - they'll be mushy). We cheated a bit, using a mixed spice pack in our brine.  In the interest of saving time, while the cukes process in the water bath, we clean up the pans and start boiling and mashing the fruit for jams.I highly recommend using the Ball Complete Book of Home Preserving for directions on how long to put the jars in the water bath. A pressure canner would also work, but we use the bath. Make sure that there is space under the jars, and at least an inch of water above the jars, for circulation.  You can do this with a washcloth or a canning basket.

Process your jars based on the jar size and recommended time.  After removing the jars from the water bath, place them on a cooling rack and wait for the joyous POP POP POP of the lids sealing. (If you don't hear the pop, they still might be sealed, but check each one before storing.)


Drying
A few years ago, I picked up a dehydrator for a song at an estate sale, and then found several additional trays and accessories the following week at Salvation Army. God really wanted me to have a food dryer! We have used it excessively, preserving anything and everything. My husband even makes jerky with it in the winter.

    
After trying three or four different brands of dehydrator, this one is definitely my favorite. It works very quickly and effectively, puts out minimal heat and noise, and has various accessories, such as the fruit roll-up trays and mesh inserts for smaller foods.

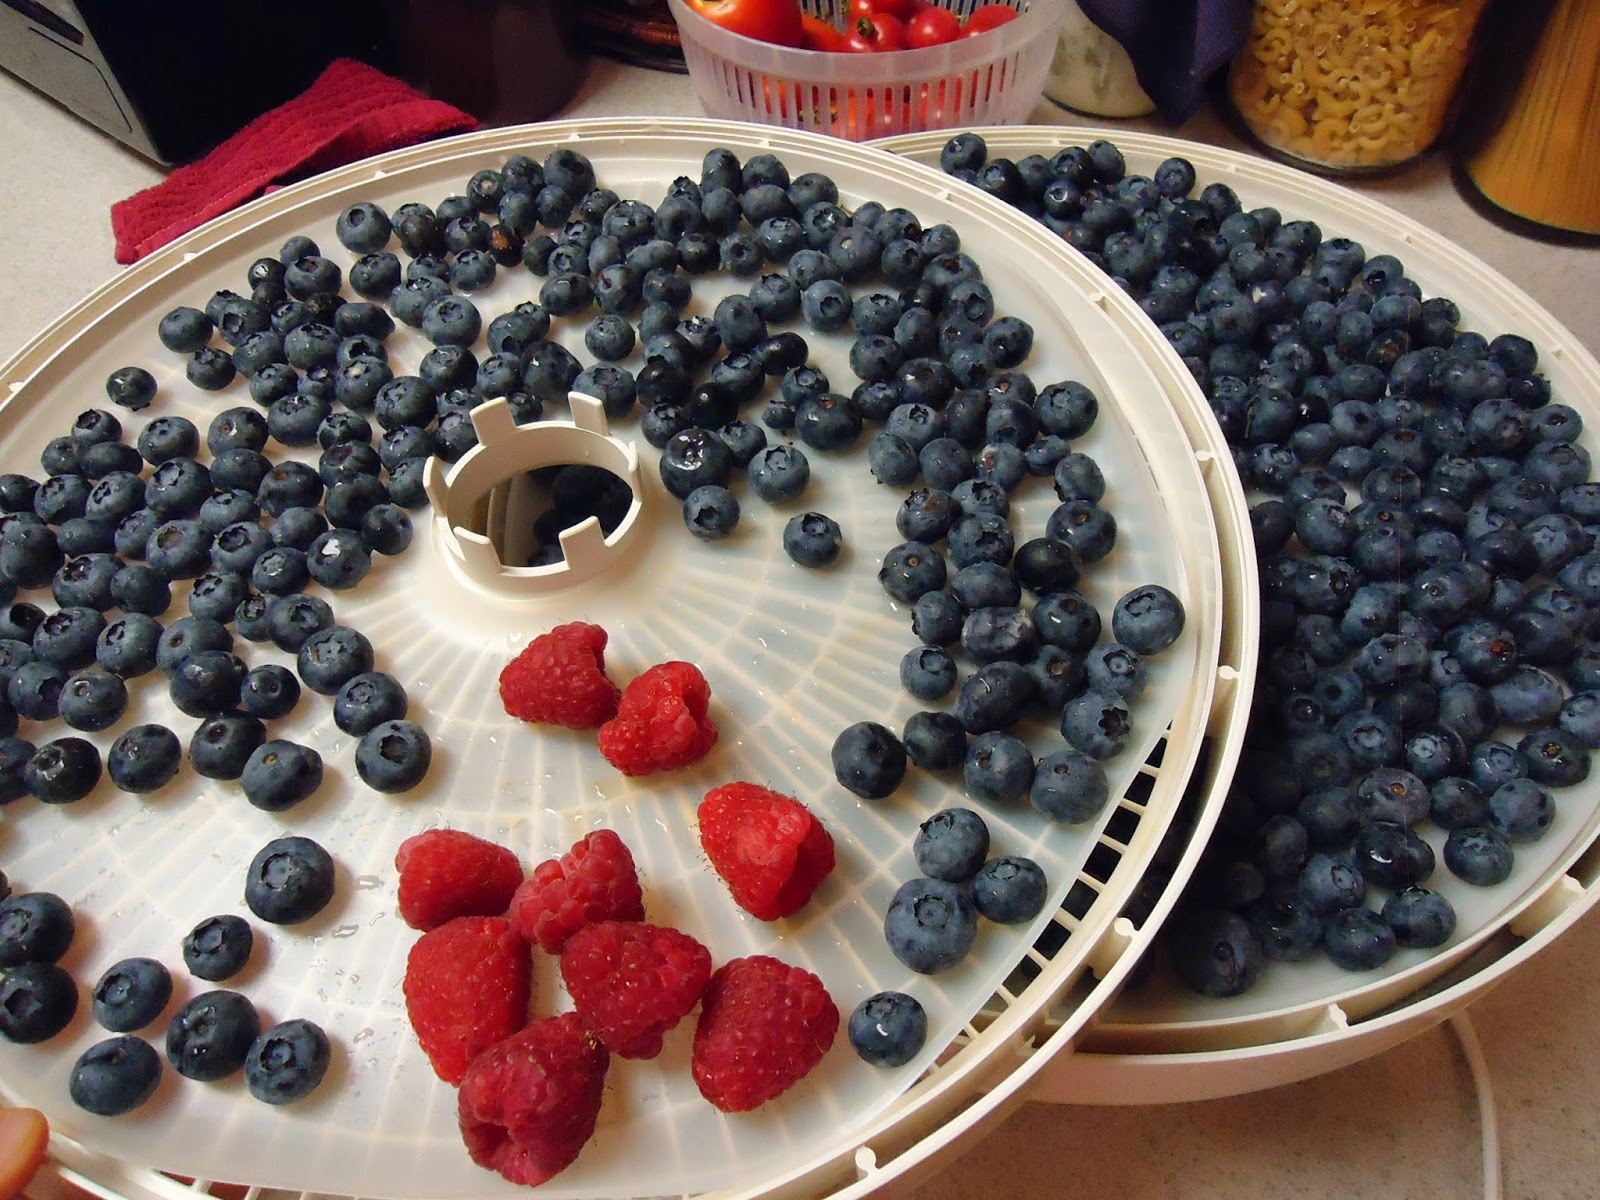
Foods with a lot of water (melons are a good example) don't dry that well.  You CAN dry them, but it's not high on my list of things to do.  Berries, apples, pears...these are some great choices for drying.  I usually buy a huge case of blueberries, then dry and portion them into vacuum bags for use in baking later.

I take excess peppers, carrots, potatoes, and even greens, dice them up into small pieces, and dry them to use as a soup blend.  During the colder months, you can put this blend into the crockpot with some meat and broth for a hearty soup!

Twenty-four hours after slicing and laying them out, we had dried apples, bell peppers, cherries, blueberries, soup blend, and mango chips. Most will be used in future recipes, but the apple & mango are just for snacking.

Getting Started with Home Canning


Pick up the Homemaking & Homesteading Bundle in our Cottage Shoppe!  

The bundle includes twenty-four tutorials with background information for anyone who is interested in homemaking and homesteading. Topics are broken down into:
  • In the Kitchen – Fall & Winter
  • In the Kitchen – Spring & Summer
  • Around the Homestead – Inside
  • Around the Homestead – Outside
For more great homesteading fun, check out the Homesteading Course at SchoolhouseTeachers!

This homeschool homesteading course is designed for anyone who has a desire to live more independently and prepare much of what is needed each day using their own hands. In this elective course, the student can learn how to work for what they want by making it themselves, instead of participating in an “on demand” society. Homeschool students of all ages learn patience, along with the skills needed to make their own cleaners for the home, sunscreen, homemade ketchup and dry mixes, as well as how to choose animals and prepare for emergencies, and much more. Learning the patience and usefulness of “doing it yourself” can be immensely helpful not only in the sense of living a healthier life, but also for the budget!

Monday, June 3

Hiking Pilot Mountain

While visiting family in North Carolina, we had the opportunity to visit Pilot Mountain, which has been a navigational landmark for centuries.  It's breathtakingly beautiful, and has several miles of hiking trails to enjoy!
The boys had never hiked up a mountain before, so this was a fun adventure!  We stopped for a few photos ops on the way, and they were fascinated at just how high up in the clouds we were.  We heard stories about airplanes of days past, how the mountain got its name, and more from our local tour guide...Grandpa.
The morning fog was settling beautifully over the hiking trails...making for some haunting scenery.
There are many raptors who call Pilot Mountain their temporary home, especially during migration season.  We were able to see how we compare to the size of them on our hike up to the lookout point.
While we weren't able to see many eagles flying around, we did enjoy the cool weather!
It wouldn't be a trip to the area without stopping off at the airport...so that's what we did!  It had warmed up considerably once we descended the mountain.
We found the Alpha Charlie and climbed around on it for a while, too.
It's so cool when you're able to take your kids back to your old stomping grounds.  For me, this airport was my home away from home....the place my grandfather taught me all he knew....and one place that really feels like home.